Table of Contents
In this article, I’m listing the 10 best tips about delay that every producer/engineer should know, even producers that are not that much into mixing.
Knowing these pieces of info allows approaching delay more knowingly.
What is delay?
Delay is an audio signal processing technique that records an input signal to a storage medium and then plays it back after a period of time. When the delayed playback is mixed with the live audio, it creates an echo-like effect, whereby the original audio is heard followed by the delayed audio. The delayed signal may be played back multiple times, or fed back into the recording, to create the sound of a repeating, decaying echo.
Learn more about delay
If you want to learn more about how to control the stereo image (and much more), then you might be interested in our Methods and Basics products.
The 10 best delay tips
Now let's go with the tips:

Delay as a pseudo-Sidechain
If you have a short sound like a slapped bass or an 808 that doesn’t have much sustain, then try using delay (or track delay) to make sure it plays slightly after the input trigger (generally the kick drum).
Considering that the sound is short already, ducking hit will make it almost disappear.
Delaying it a bit allows to not duck the sound heavily or at all, making the kick drum not clash with the delayed sound.
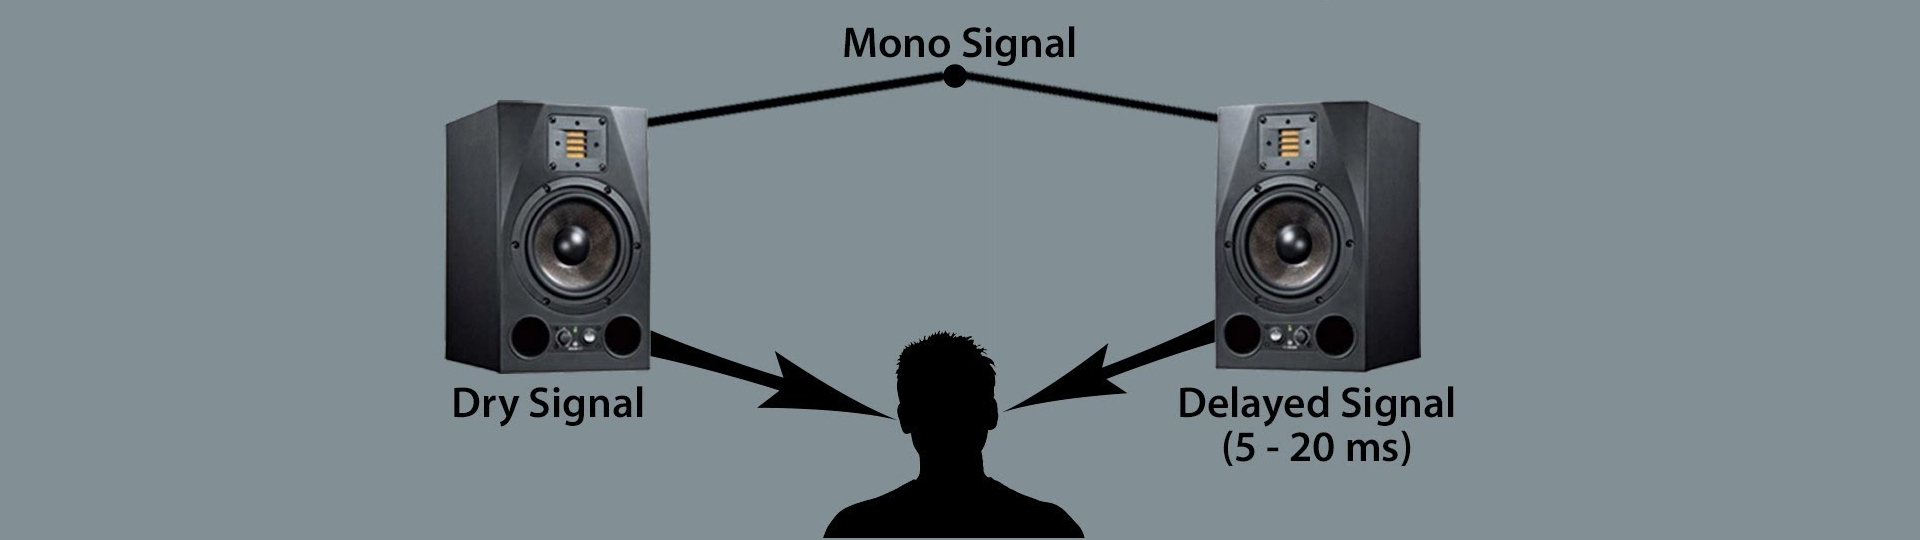
Haas Effect
The Haas Effect is the result of a sound coming to our ears with a slight difference of time (generally 1 to 30ms), giving a sense of width.
What matters is the difference in time between the Left and Right channels, so only one channel actually needs to be delayed.
Delaying one channel will make the sound come from the opposite side.
The major problem with this technique is comb-filtering when the master is switched to mono.
To avoid this, it’s preferable to set the delay already in mono. This way you can listen to the notches created (which are strictly related to the frequency content and the delay time), and move them so they cut frequency ranges poor of content.
Another way to soften this downside is to apply it in parallel, so you can control how deep the notches are.

Tape Delay
This type of delay has the peculiarity of having each repetition decay not only in terms of volume but also in terms of frequency content (making each instance darker than the previous one). It degrades over time, and it’s great if you want to add mojo, especially on plucks and string instruments. You’d better find a tape delay-style plugin rather than trying to emulate its behavior by yourself because it might become quite tricky and time-consuming.
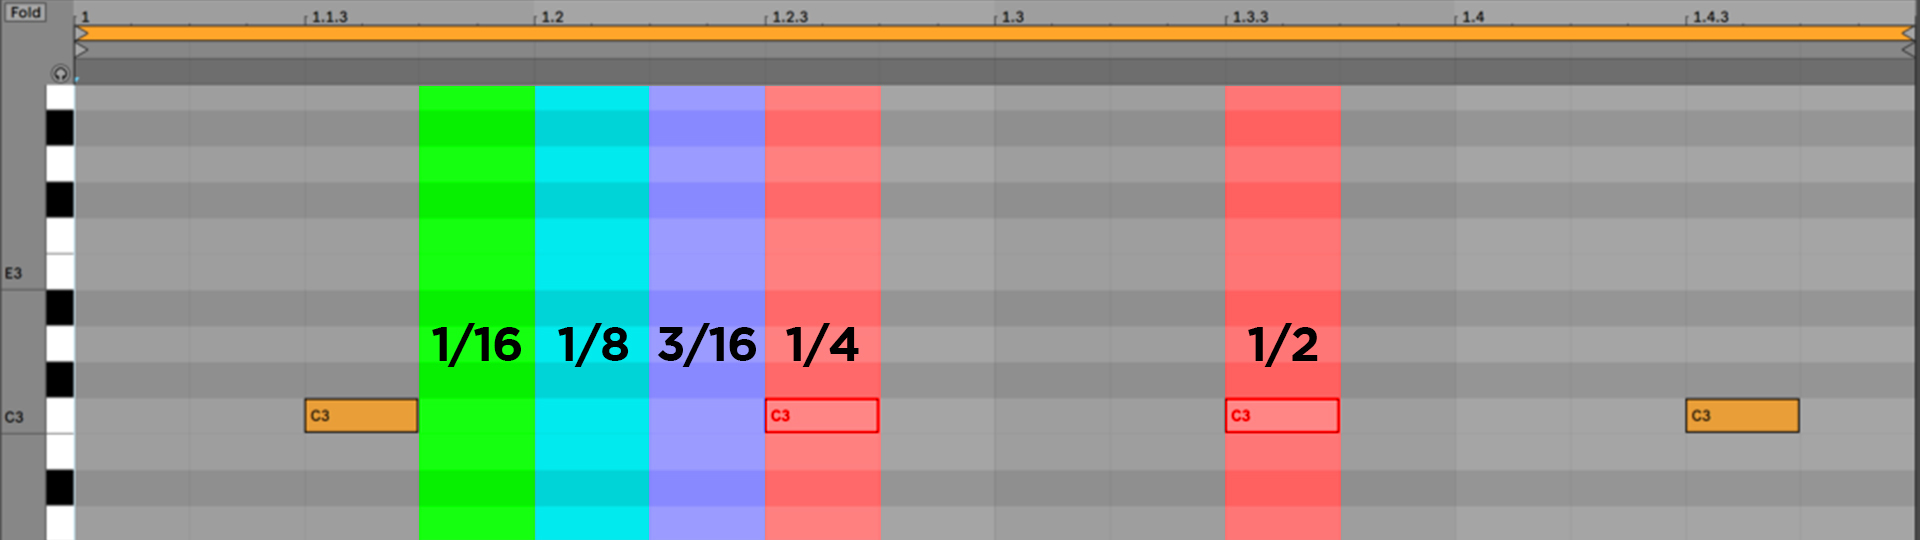
Use delay to complement
If you have, let’s say, an arpeggio at ⅛ speed, then you shouldn’t go for a ⅛ delay because each repetition will overlap with the next note. Instead, use a 1/16 delay time (or 3/16, 5/16, and so on with odd numbers) for example, so it fills the gaps in between.
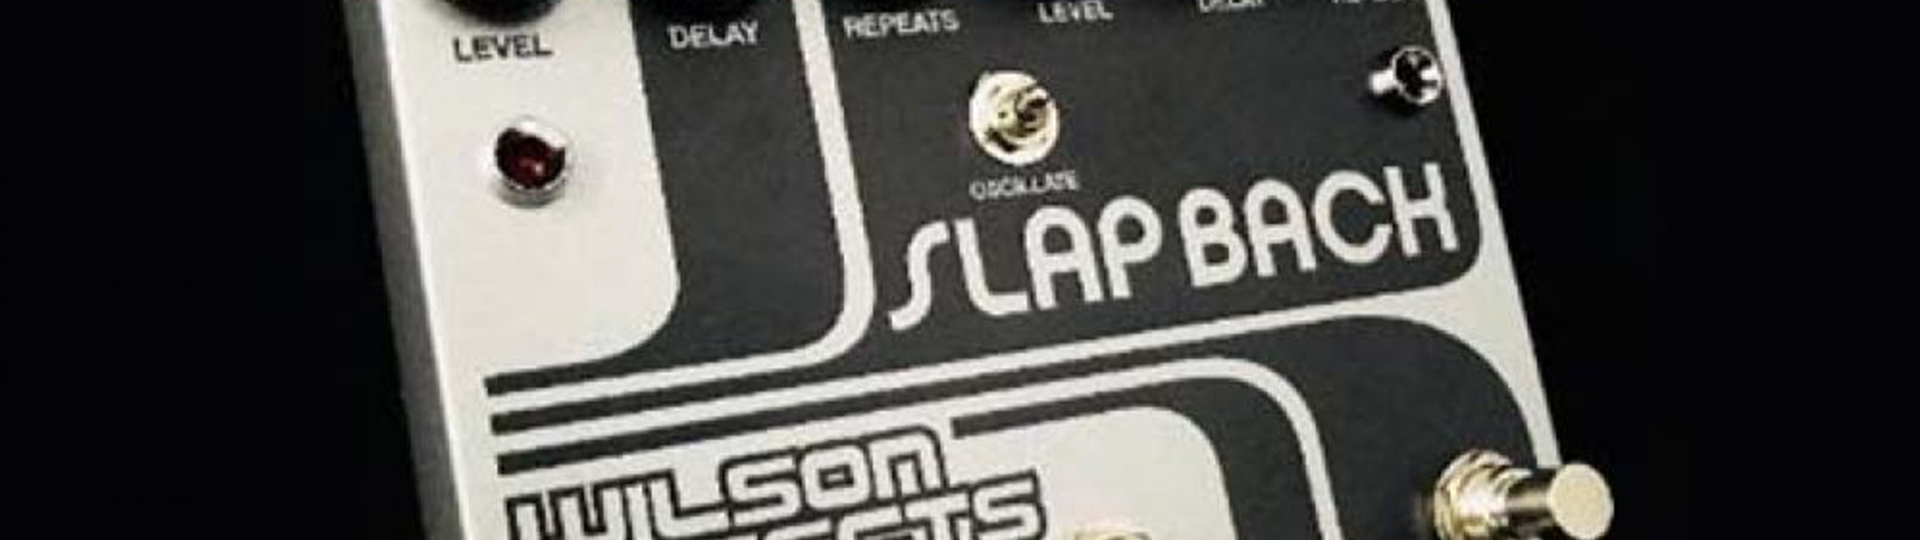
Slapback delay
This type of delay is pretty straightforward: delay time from 90ms to 150ms circa and 0 feedback. You only want a single and fast yet noticeable reflection of the sound.
Typically used on guitars, the effect sounds like the instrument is being strummed.

Delay for bigger vocals
Want to make the vocal feel bigger without pushing it too behind in the mix with reverb?
Set a delay in parallel and play with very short times (somewhere between 1 to 30ms) so the delay isn’t distinguishable, but it still sounds like a very short reverb without the hassle of dealing with annoying tails.
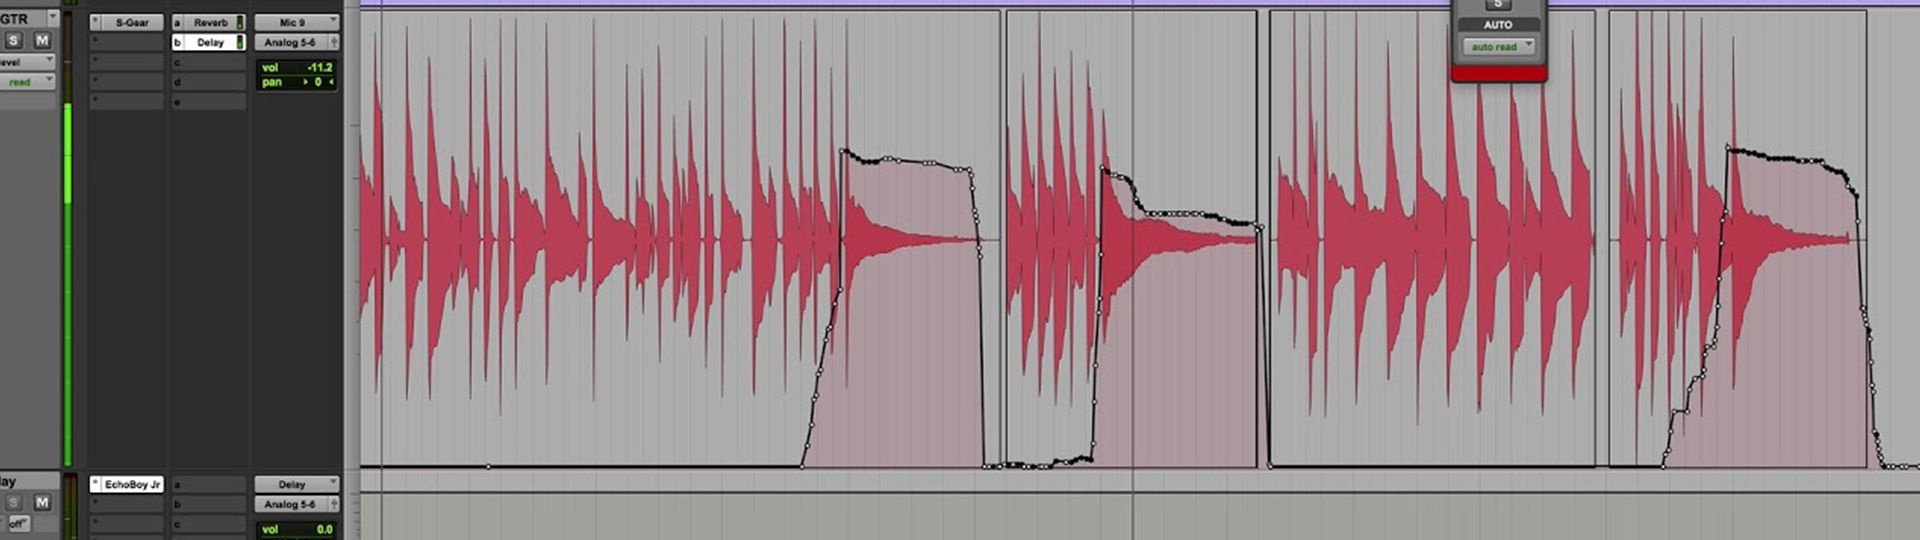
Delay throws
Delay throws are nothing else that those “fillers” you hear, especially on vocals, during some gaps. Delay throws consists of a simple delay but automated to kick in only during specific moments, so you can highlight specific words and enhance their emotional impact.
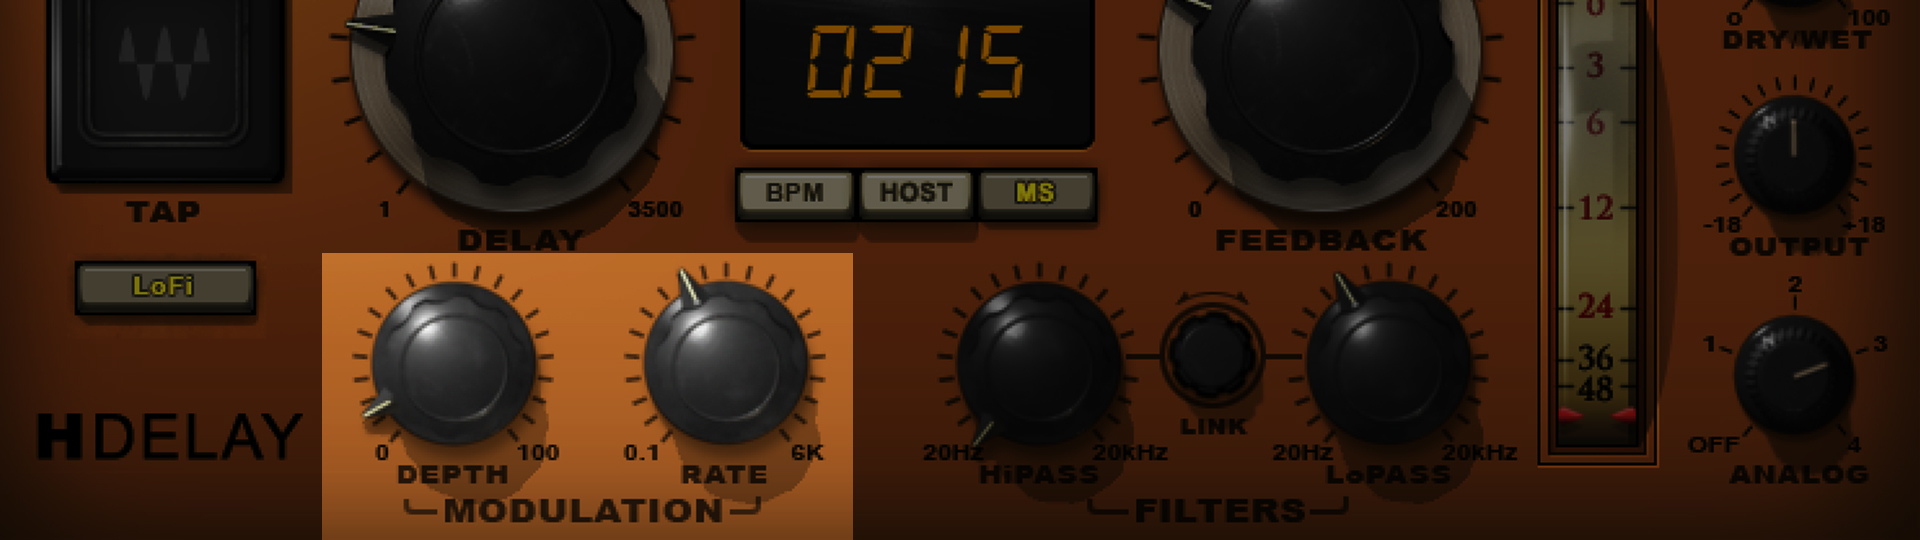
Modulate
If it’s just not enough, try making the delay come alive and have character by using the modulation features in your delay (if available). Generally, making things move in music just works.
Tape Stop
If you want to emulate a tape stop effect, all you need is to set a delay as an insert at 100% Wet and set it at 0ms and no feedback. If your delay time starts any higher, make sure to compensate for that with the track delay.
You can also automate the On/Off to make it work only when you need it.
Whenever you want to slow down the sound, create an automation line that ramps from 0 to the desired delay time. The more you delay it, the more you stretch the audio and lower the pitch.
If it isn’t working, then check if your delay has different delay modes. For example, Ableton Delay features Repitch, Fade, and Jump (Repitch is the mode you want for this effect).
Process it
If you’re running delay in parallel, then you have plenty of choices to process it.
The most common ways to make a delay signal fit the mix are:
- EQ’ing so it doesn’t build up with the rest of the spectrum excessively.
- Saturating so it has more grit and character, making it detach a bit from the input source.
- Reverberating it so it’s pushed back in the mix, creating a sense of depth.
- Chorusing/Flanging it so it has a smoother and less predictable feel.
Beat Spot Mixing Tips
If you’ve found these tips helpful, then you’ll appreciate all the knowledge we’ve packed into Mixing Tips, our flagship PDF with a section dedicated to delay among a total of 13 chapters!