Your PC aka Your Knife
Let’s jump back to the homo sapiens era: no technology here, just caves and the need for eating. There are two men in the rage valley. One is Sam, and the other one is called Tom. Their primary obligation is to eat, to keep their bodies alive. They have to go out and hunt to survive.
As soon as he wakes up, Sam takes a couple of rocks and goes with his instinct. Even if he wakes up very hungry, Tom spends an hour every morning to shape the stone with another stone, to get some sorta “knife.”
Sam stays all day long, and sometimes, even if he finds the right animal, not every time manages to kill them. Tom, who has spent 1 hour in the morning sharping his “knife,” at the same time, works to obtain more food than Sam.
At the end of the winter, Sam will die because he hasn’t eaten enough to survive.
Now pick this story, transpose it to our current days and switch food with music production and “knife” with PC or Mac. Makes more sense?
Windows optimization for music production

70% of the work is the preparation, not the actual work. Your PC/Mac is where the magic happens. You want it to perform well and fast when you got the click of an idea in your head.
But how do we get a fast machine for music production?
The most important thing to get a fast machine is the machine itself. If you have a poor configuration in terms of hardware, we can’t do miracles. But you can still squeeze some more power out of what you got.
1 - Update Graphics Card Drivers
Outdated graphics drivers will not effectively utilize the Graphics Processing Unit (GPU).
They will instead tax the computer’s processor, stealing valuable resources from your DAW.
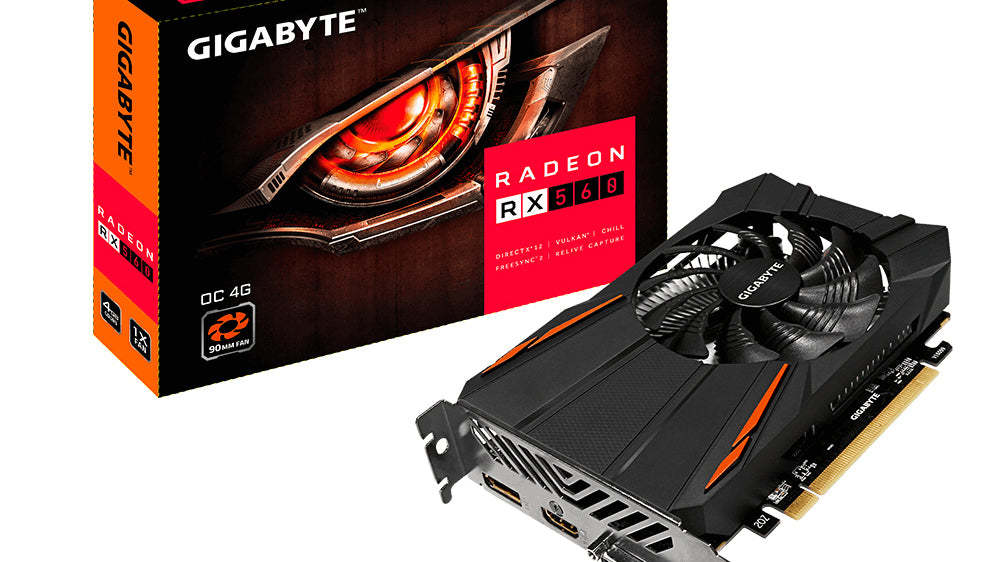
Here’s how to update them:
- Click on the Windows Start button to bring up the Start Menu.
- Type Device Manager and press enter.
- Click the triangle next to Display Adapters.
- Your graphics card model will appear directly below.
- Double-click this item to view its properties.
- In the General tab, make a note of the model (shown at the top of the window) and the manufacturer.
- Select the Driver tab.
- Make a note of the driver version and date.
- To find the latest driver for your Graphics Controller, go to the appropriate manufacturer’s web site:
- Locate the appropriate driver for your graphics controller. If your current driver is earlier than the latest version offered on the manufacturer’s website, download and install the newest version.
2 - Disable Turbo Boost and C-State Transition (BIOS)
These settings are not available on all computers, but it is essential to disable them if possible. When either of these is enabled, the processor will dynamically change speeds depending on computing activity. This throttling may cause errors in DAW. 
To disable them, you have to go through the BIOS. To learn how to enter the bios, head to your motherboard’s manufacturer website.
3 - Adjust power options
This optimization prevents the computer from going into Sleep Mode, causing playback issues with audio interfaces. It will also prevent the hard drives from going to sleep and disables USB Selective Suspend, causing pops and clicks during record and playback with USB interfaces when enabled. 
- Open the Start menu, type Control Panel, and press Enter.
- In Large icons View, click on Power Options.
- Select the High-Performance power plan. Click on the Change plan settings link.
- Set the display’s sleep time to Never.
- Set the computer’s sleep time to Never
- Click on the Change advanced power settings link.
- Click on the + sign next to Hard Disk.
- Click on the + sign next to Turn Off Hard Disk After.
- Click in the Value box; the text entry field will now be accessible.
- In the text entry field, type Never.
- 11. Click on the + sign next to USB settings.
- Click on the + sign next to the USB selective suspend setting.
- Double-click, where it says, Enabled and switch on Disabled.
- Click on the + sign next to Processor power management.
- Click on the + sign next to the Minimum processor state.
- Type 100 in the Setting (%) text entry field.
- Click Apply then OK
- Click Save Changes.
- Close the Power Options window
4 - Disable USB Power Management (if you use USB Audio interfaces)
This optimization frees up bandwidth on the USB bus and can help resolve device recognition and driver installation problems.
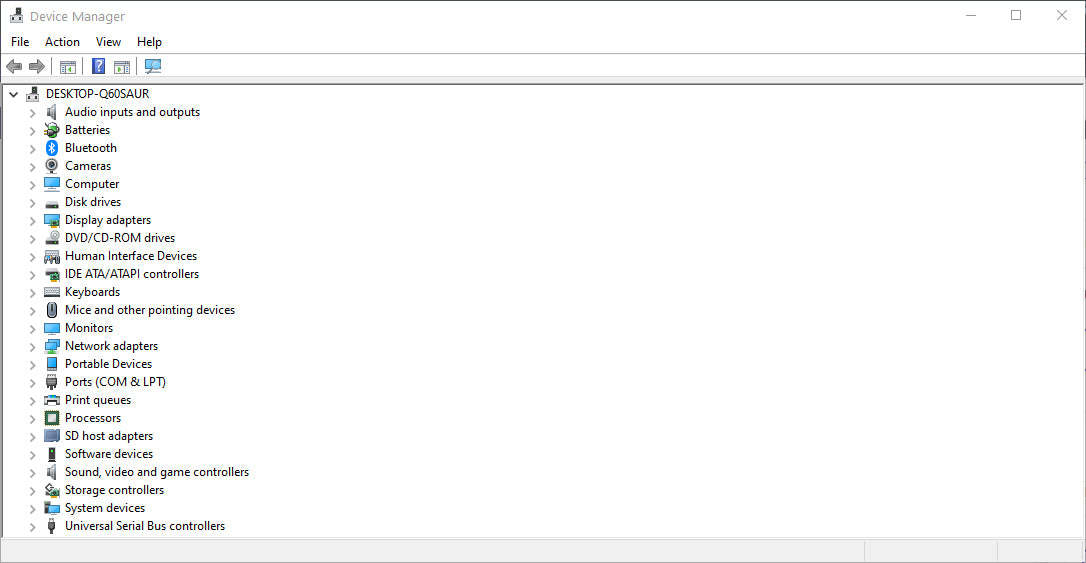
- Click on the Windows Start button to bring up the Start Menu.
- Type Device Manager and press enter.
- In the Device Manager window, double-click on Universal Serial Bus Controllers.
- Double-click on the first USB Root Hub item.
- Click on the Power Management tab.
- Uncheck the box that says “Allow the computer to turn off this device to save power” and click OK.
- Repeat this process for all other USB Root Hub items.
5 - Disable Hyper-Threading
This optimization prevents processor Hyper-Threading, which can cause CPU errors in DAWs. Note that some other applications, including Media Composer, may perform better with Hyper-Threading enabled. Hyper-Threading settings are found in the BIOS, and they vary by computer model and BIOS version. Go to your motherboard website to learn how to disable them.
6 - Run as Administrator
This can help with various launch issues as well as a variety of MIDI issues.
- Right-click on your DAW’s icon on your desktop.
- Choose Properties.
- Click on the Compatibility tab.
- Check the box that says Run this program as an administrator.
- Click Apply and then OK.

7 - Hard Disk Optimization

- Open the Start menu and click on File Explorer.
- Click This PC in the left column.
- Right-click on the first drive you intend to use for audio storage.
- Choose Properties.
- If checked, uncheck Compress this drive to save disk space.
- If checked, uncheck Allow files on this drive to have contents indexed.
- Click Apply and then OK.
- Repeat the process for each of your audio drive.
8 - Install Latest Device Drivers
It is essential to install the latest drivers available for your audio interface. To prevent any issues while the audio passes through the interface, just keep it updated.
MacOS Optimization for music production
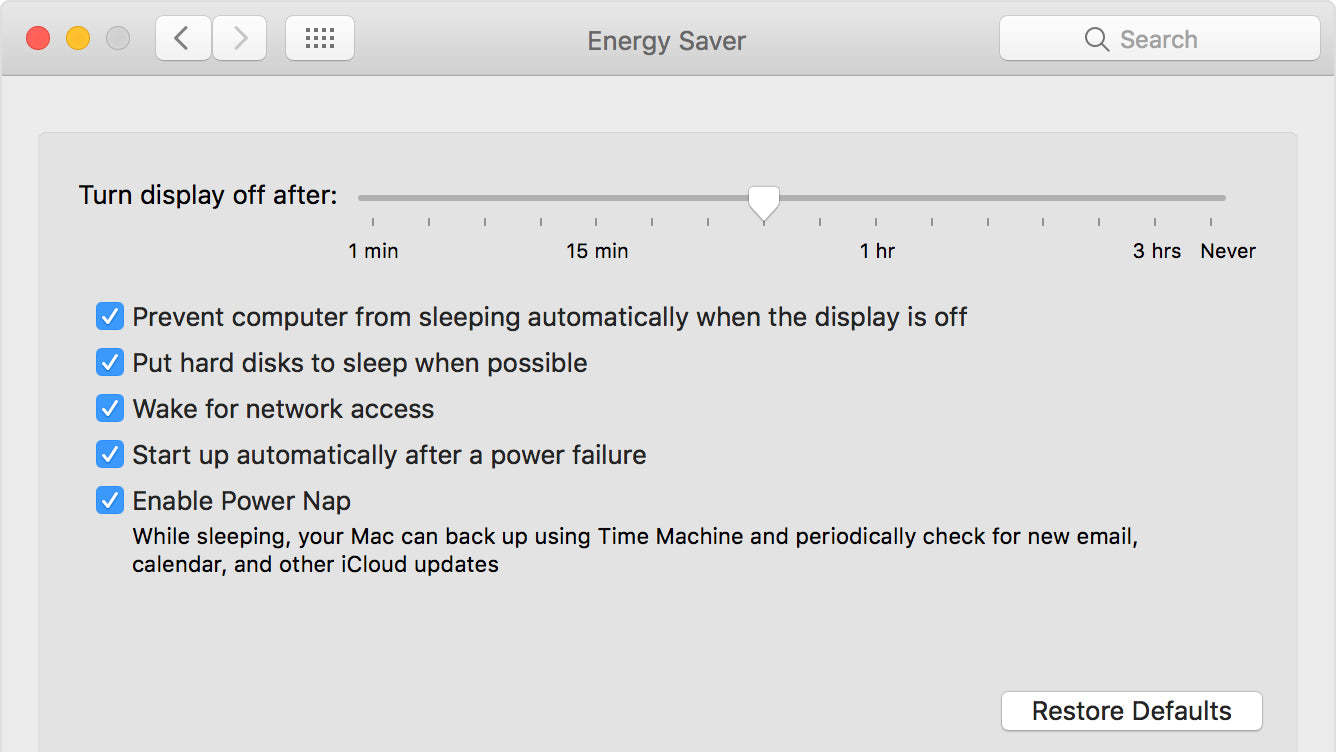
1 - Optimize Energy Saver
This optimization will free up system resources and prevent the computer from going to sleep or standby mode.
- Open System Preferences.
- Click ‘Energy Saver.’
- Do one of the following (available option depends on your computer model). a. If present, set the ‘Computer sleep’ slider to Never. b. Otherwise, check the box that says ‘Prevent computer from sleeping automatically when the display is off.
- Un-check the box for Put hard disks to sleep when possible.
- Uncheck the box for Enable Power Nap.
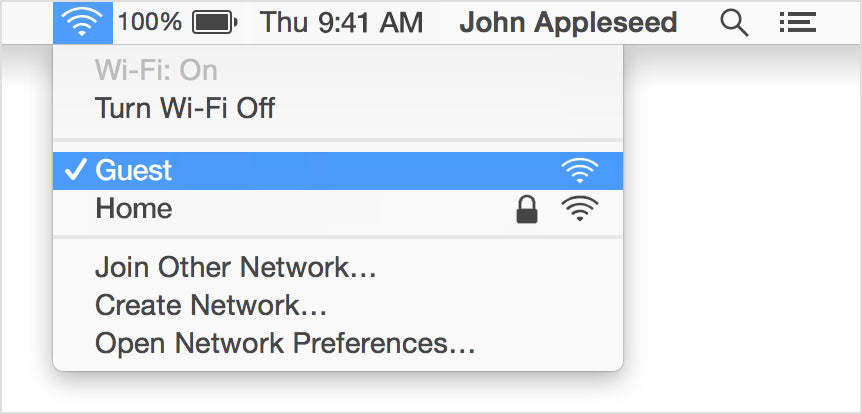
2 - Turn off Wi-Fi
If your Mac is equipped with Bluetooth wireless and Wi-Fi, these may need to be disabled for DAWs to work at their best.
- Open System Preferences.
- Click Network.
- On the left-hand sidebar, click on Wi-Fi.
- Click on the button that says Turn Wi-Fi Off.
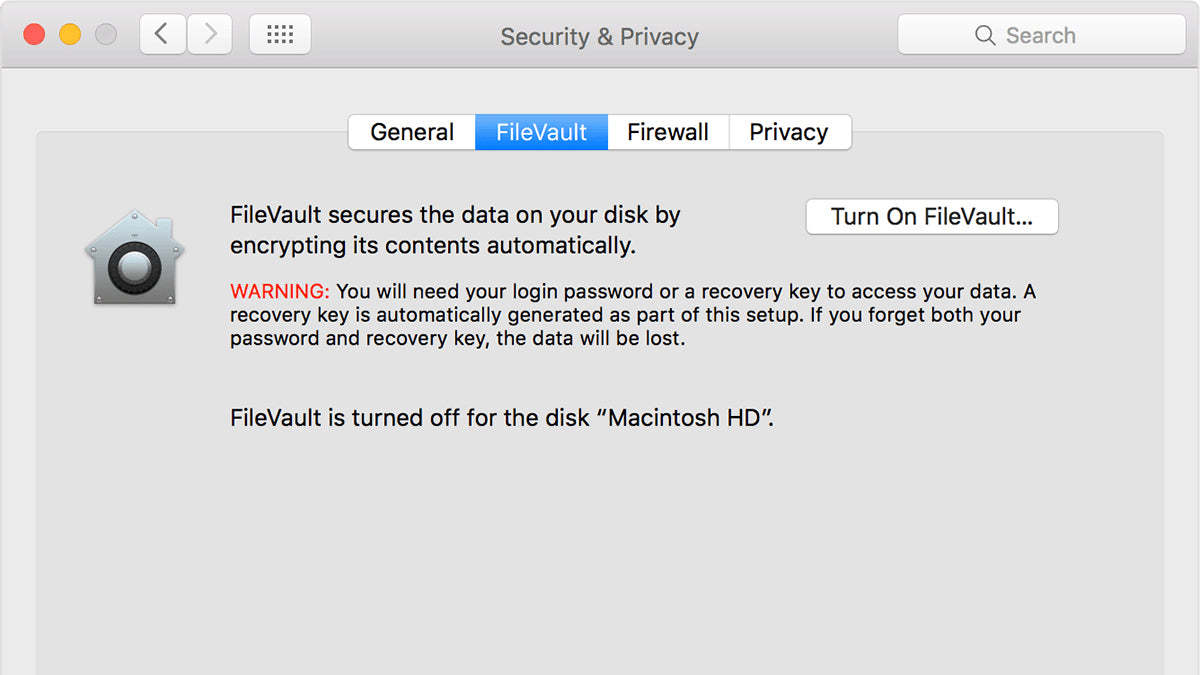
3 - Disable FileVault protection
This optimization will allow your hard drive to work more efficiently with audio.
- Open System Preferences.
- Click Security & Privacy.
- Click on the FileVault tab.
- In this window, find where it states: FileVault protection is (on/off) for the hard disk.
- If FileVault is on, click the button to Turn Off FileVault.
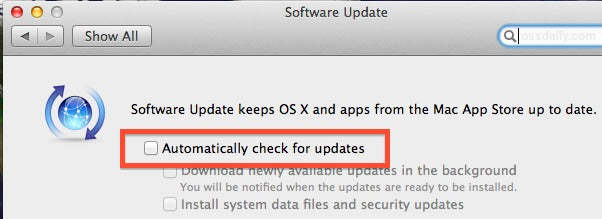
4 - Automatic Updates
Some updates to your Mac software can cause conflicts with your DAW (like the Catalina one). Therefore, it is suggested to disable the automatic update functionality within the operating system.
- Open System Preferences.
- Click the App Store.
- Make sure the box labeled Automatically check for updates is unchecked.
These tweaks are just a taste of what you can do to work better and faster. We took a year to collect experiences and strategies that will help you develop a workflow. We collect everything in a book.
Beat Spot Workflow
If you’ve found these tips helpful, then you’ll appreciate all the knowledge we’ve packed into Workflow, a bundle comprising a plethora of resources to become a more efficient producer!

